 Save
Save Every December, my kitchen transforms into a chocolate workshop the moment the holiday music starts playing. One afternoon, my daughter dumped a box of Kinder bars on the counter and asked if we could build something edible—and these little trees were born that day, sticky fingers and all. They're so simple that even the chaos of a busy kitchen becomes part of the charm, and somehow they always disappear faster than you'd expect.
The first time I made these for a holiday potluck, I was genuinely nervous about whether stacked chocolate bars would look intentional or just sloppy. But watching people's faces light up when they realized they could eat the whole thing, tree-shaped decorations and all, reminded me that homemade doesn't have to be complicated to feel special.
Ingredients
- 24 mini Kinder chocolate bars: The star of the show—they're already individually wrapped and perfectly sized, plus kids recognize them instantly which makes the whole process feel like building with chocolate.
- 150 g dark or milk chocolate, chopped: Your drizzle base; dark creates elegant contrast while milk chocolate feels more festive and approachable.
- 1 tsp coconut oil: A tiny secret that makes melted chocolate flow like silk instead of clumping, though it's completely optional if you're patient with low heat.
- 3 tbsp festive sprinkles or edible glitter: The moment these hit the wet chocolate, they stick like magic and make each tree look genuinely celebratory.
- 8 mini chocolate stars or candy stars: Your tree toppers; they're the detail that transforms stacked bars into actual trees.
Tired of Takeout? 🥡
Get 10 meals you can make faster than delivery arrives. Seriously.
One email. No spam. Unsubscribe anytime.
Instructions
- Set up your workspace:
- Line a tray with parchment paper so your finished trees have somewhere clean to live while they chill. This tiny step saves you from chocolate-sticky trays later.
- Build your tree stacks:
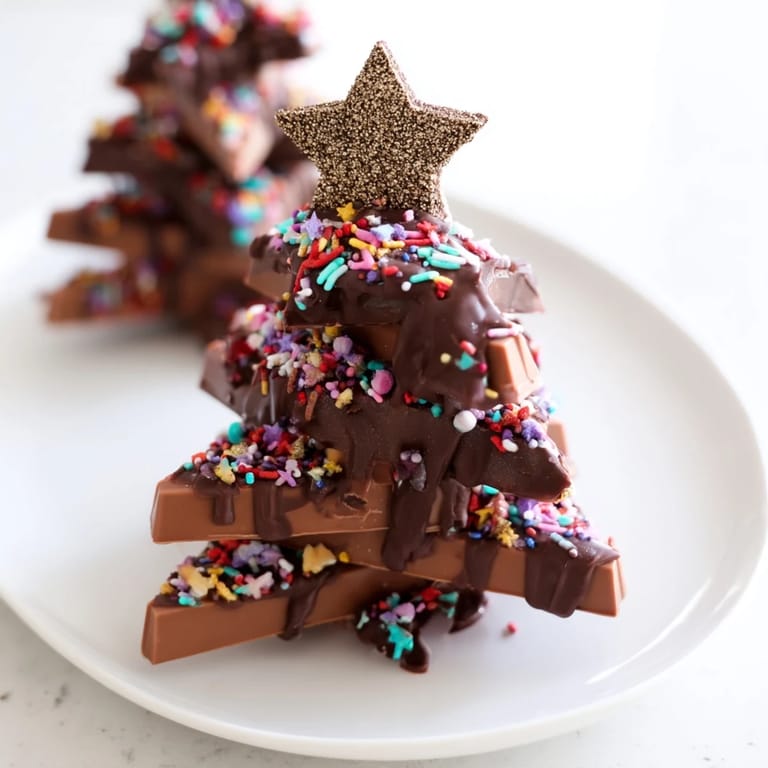
- Unwrap the Kinder bars and start stacking—one whole bar as your base, one broken in half and overlapped slightly for a wider middle, then another on top for height. They don't need to be perfect; uneven edges actually read as more tree-like.
- Arrange on the tray:
- Space each stack a few inches apart so you have room to drizzle without the melted chocolate connecting them all into one chocolatey mess.
- Melt the chocolate gently:
- If using the double boiler method, let the steam do the work rather than direct heat; if microwaving, go in 20-second bursts and stir between each one so nothing burns. The moment it's smooth, you're done.
- Drizzle with intention:
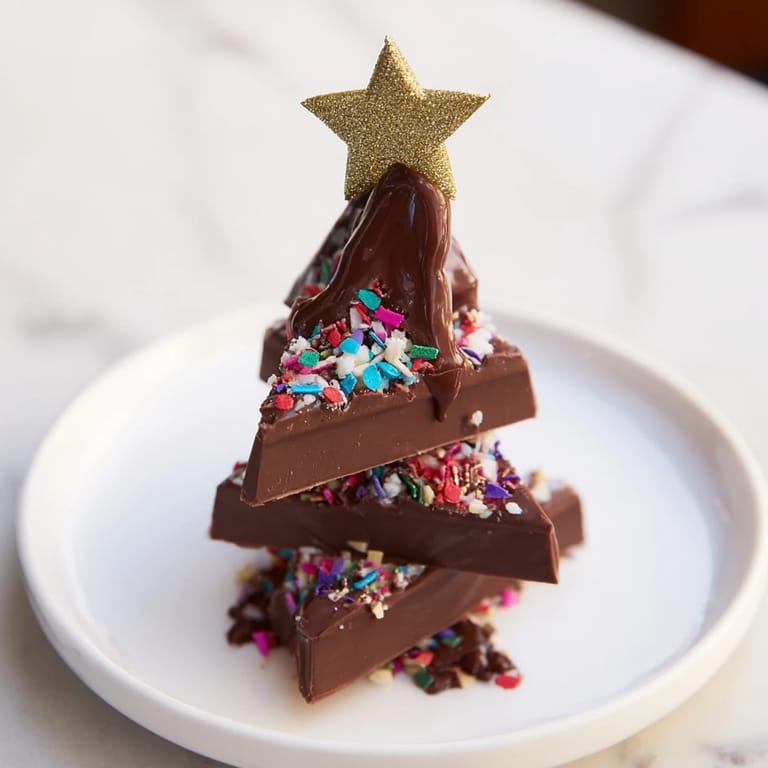
- Spoon or pipe the chocolate over each tree in loose, generous strokes that look like frosted branches. This is where the magic happens and it's actually forgiving because imperfect drizzles feel more natural.
- Decorate before it sets:
- Sprinkle immediately while the chocolate is still wet, then crown each tree with a star before the drizzle hardens. If you wait too long, the sprinkles won't stick.
- Chill and serve:
- Pop them in the fridge for 10 to 15 minutes until the chocolate firms up, then serve them however they are or let them come to room temperature if you prefer softer chocolate.
 Pin it
 There was a moment last year when my son carefully arranged his homemade tree on his plate and declared it too pretty to eat. He changed his mind about three seconds later, but that hesitation felt like the whole point—these little stacks of chocolate actually made dessert feel like something to celebrate rather than just consume.
Why These Trees Work for Holiday Parties
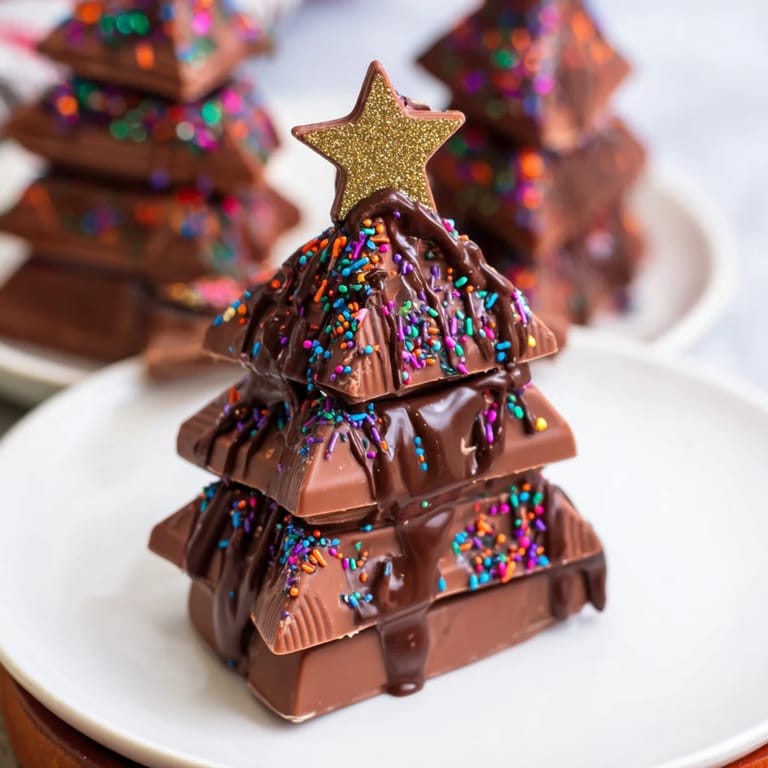
These feel handmade and special without requiring any actual baking skills, which means you can show up to a gathering with something that looks like you spent hours in the kitchen when you really spent twenty minutes. The best part is watching people realize they're made of Kinder bars—there's something irresistible about that combination of nostalgia and festivity.
Making Them Kid-Friendly
If you're building these with children, let them do as much stacking and decorating as they want. The asymmetry is actually charming, and kids are naturally good at making things look festive because they don't overthink it. Give them a small bowl of sprinkles and a spoon to drizzle with, and they'll stay engaged the entire time.
Storage and Variations
Keep these in an airtight container in a cool spot and they'll hold up beautifully for about a week, though they rarely last that long. You can swap out the Kinder bars for any mini chocolate bars you love, use white chocolate for a snowy effect, or go full dark chocolate for something more sophisticated.
- Try white chocolate drizzle with green sprinkles for an icy forest vibe.
- Crush some candy canes and sprinkle them on top for peppermint crunch.
- Make them the day before so you can relax on party day instead of melting chocolate last minute.
 Pin it
 These trees have become our shorthand for easy holiday magic—proof that the best festive food is the kind that brings people together without stress. Make them once and you'll find yourself making them every December after.
Frequently Asked Questions
- → How do I create the tree shape with Kinder bars?
Stack three mini bars: one whole, one broken in half and overlapped to form a triangle, and one more on top for height, shaping a festive tree form.
- → What is the best chocolate for drizzling?
Use dark or milk chocolate melted with a bit of coconut oil to achieve a smooth, glossy drizzle that sets nicely on the stacked bars.
- → Can kids help with assembling these treats?
Yes, the stacking and decorating steps are simple and fun, making it a great activity for children during the holidays.
- → How should I store the finished treats?
Keep them in an airtight container in a cool place or refrigerate to maintain freshness for up to one week.
- → Are there any allergen considerations?
These treats contain milk and soy, and may have traces of nuts and gluten depending on the chocolate used. Always check packaging details.