 Save
Save I was wrapping up holiday decorations one gray December afternoon when my daughter pressed her nose against the kitchen window, asking if we could make something she could give her friends at school. That's when the idea hit—snowmen we could actually eat. What started as a casual Saturday project turned into this delightful ritual where we'd crush cookies, roll dough, and transform simple ingredients into little edible characters that made people smile. These Oreo snowman cake pops became less about following steps and more about creating something with our hands that felt like winter magic.
I'll never forget the look on my coworker's face when she bit into one at the office holiday party—her eyes lit up like she'd just discovered something forbidden and delicious. That moment made me realize these weren't just cake pops; they were little carriers of joy that somehow managed to be both festive and deeply comforting at the same time.
Ingredients
- Oreo cookies: Thirty-six cookies crushed into fine crumbs create the soul of this recipe, and that cookie-to-cream-cheese ratio is what keeps everything moist and cohesive.
- Cream cheese, softened: Room temperature is crucial here—cold cream cheese will fight you as you mix, but soft cream cheese blends into the cookie crumbs like it belongs there.
- White chocolate or candy melts: Candy melts are more forgiving for coating since they stay smooth longer, but real white chocolate gives a more luxurious finish if you're patient.
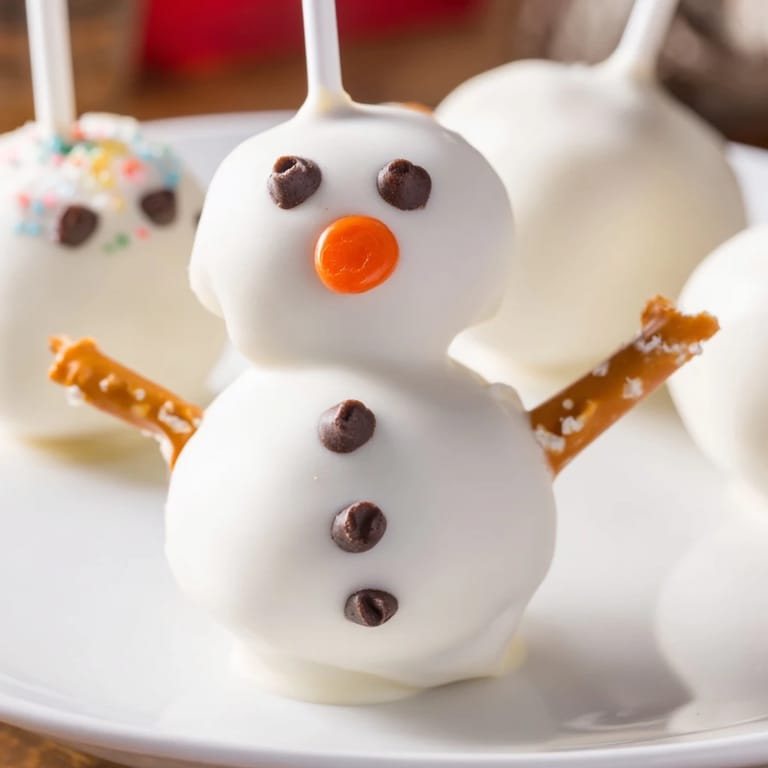
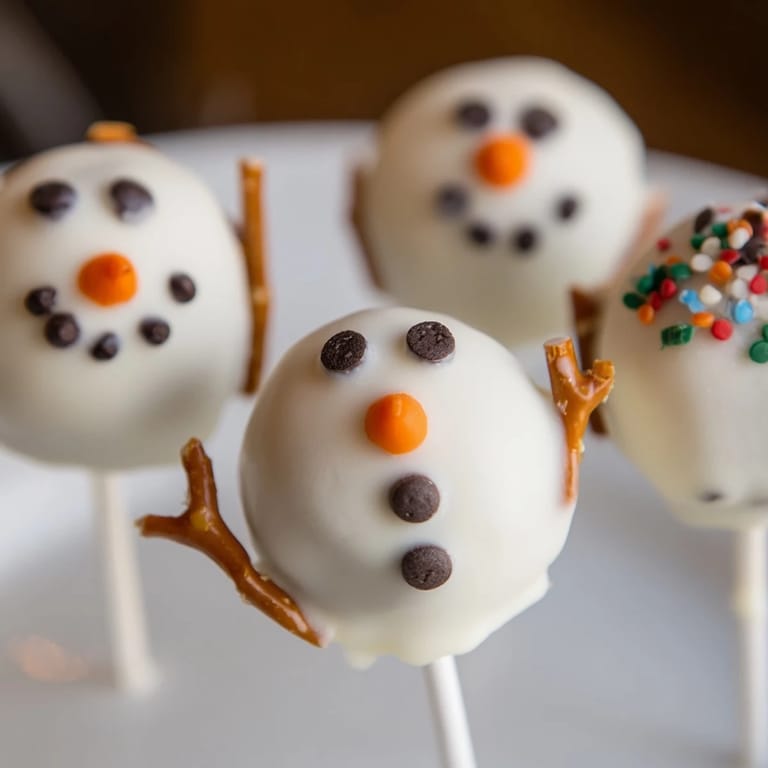
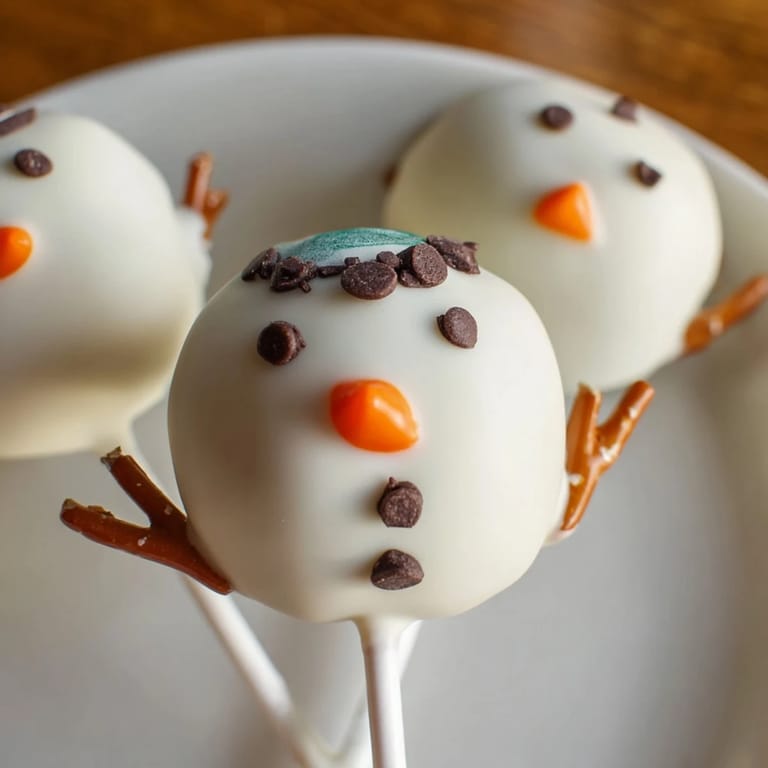
- Mini chocolate chips or black decorating gel: These become the snowman's eyes and buttons, and chocolate chips are easier to stick into tacky coating than gel, though gel gives cleaner lines.
- Orange sprinkle or colored icing: A tiny dot of orange becomes the carrot nose, and it's where you can play—some people use orange fondant for a 3D nose instead.
- Pretzel sticks or colored fondant: Pretzels add a salty contrast that actually works beautifully, but fondant lets you create scarves and arms in any color you imagine.
- Lollipop sticks: These are your structural backbone, holding each snowman together from inside and giving you something to hold while coating.
Tired of Takeout? 🥡
Get 10 meals you can make faster than delivery arrives. Seriously.
One email. No spam. Unsubscribe anytime.
Instructions
- Crush and combine:
- Pulse your Oreos until they're fine crumbs—not powder, but close. Mix with softened cream cheese using your hands or a fork; your hands actually work best here, letting you feel when the mixture is perfectly uniform and ready to roll.
- Roll the bodies:
- You'll make two sizes of balls—smaller ones for heads, larger ones for bodies. The dough should hold together easily; if it's too crumbly, let your cream cheese warm up a touch longer.
- Stack and secure:
- Press the small ball gently onto the large ball, then push your lollipop stick through the center of both, angling slightly so it feels stable. This is where patience pays off—a gentle hand creates cleaner snowmen than rushing.
- Chill until firm:
- Twenty to thirty minutes in the freezer makes them solid enough to coat without falling apart, and this step is non-negotiable no matter how eager you are to move forward.
- Melt and coat:
- White chocolate should be smooth and pourable but not hot—stir it slowly in the microwave in thirty-second bursts. Dip your frozen snowmen confidently, turning to coat all sides, then let excess drip before standing them upright to set.
- Decorate while tacky:
- This is the window of opportunity—while the coating is still slightly sticky, press in your chocolate chips for eyes and buttons. Once it sets firm, you'll need a tiny dab of extra melted chocolate to make things stick.
- Add finishing touches:
- Pretzels break cleanly if you snap them at an angle, making perfect stick arms, while fondant scarves can be wrapped around the neck for a polished look.
 Pin it
 There was an evening in early January when my neighbor knocked on the door with a plate of homemade cookies as a thank-you gift, and I sent her home with a container of these snowman pops instead. She came back three days later and asked for the recipe, saying her family had demolished them and wanted to make them again. In that moment, I understood that feeding people something you made with your own hands, something whimsical and delicious, creates a connection that store-bought treats never quite manage.
Finding the Right Consistency
The dough mixture is where most people second-guess themselves, but trust your instincts. It should be thick enough to hold its shape when rolled but still feel slightly moist, never crumbly or tight like playdough. I learned this by watching the mixture transform gradually as I combined warm cream cheese with cookie crumbs—it comes together in its own time, and pushing it speeds nothing up.
The Coating Strategy
Your chocolate coating should never be smoking hot, because that heat will melt your carefully frozen snowman and leave you with cake-pop soup. Slow and steady melting in short microwave bursts gives you better control and prevents seizing or scorching. Some people thin their melted chocolate with a teaspoon of coconut oil to make it flow more smoothly, though I've found good white chocolate needs no help if you're patient.
Decorating with Personality
This is where your snowmen become characters instead of treats. I've seen people create snowmen with scarves in their favorite colors, use different expressions with the eye placement, and even add tiny fondant hats. The beauty is that each one will be slightly different, and those imperfections are what make them feel handmade and special rather than manufactured.
- Prep all your decorations before you start coating so you're not hunting for materials while your chocolate sets.
- Use a small dab of melted white chocolate as an edible glue if your decorations aren't sticking to the firm coating.
- Keep these in the refrigerator and bring them to room temperature for fifteen minutes before serving so the coating softens just enough to be pleasant to bite into.
 Pin it
 These little snowmen have a way of turning an ordinary day into something memorable, whether you're making them for a school party or sneaking one from the fridge late at night. There's something deeply satisfying about creating something beautiful and delicious with your own hands, especially when it brings smiles to the faces of people you care about.
Frequently Asked Questions
- → What type of Oreos work best for the dough?
Standard Oreo cookies with the classic creme filling provide the best texture and sweetness for the dough mixture.
- → Can I substitute cream cheese with another ingredient?
Cream cheese is essential for binding and moisture, but a full-fat mascarpone can be used for a similar creamy consistency.
- → How do I make sure the coating sets properly?
Ensure the chocolate or candy melts are fully melted and smooth before dipping; after coating, place pops upright in a cool area to harden evenly.
- → What’s the best way to decorate the snowmen’s features?
Use mini chocolate chips or black decorating gel for eyes and buttons, and add a small orange sprinkle or icing for the nose for a charming look.
- → How should I store these treats to keep freshness?
Store in an airtight container in the refrigerator for up to 5 days to maintain freshness and texture.