 Save
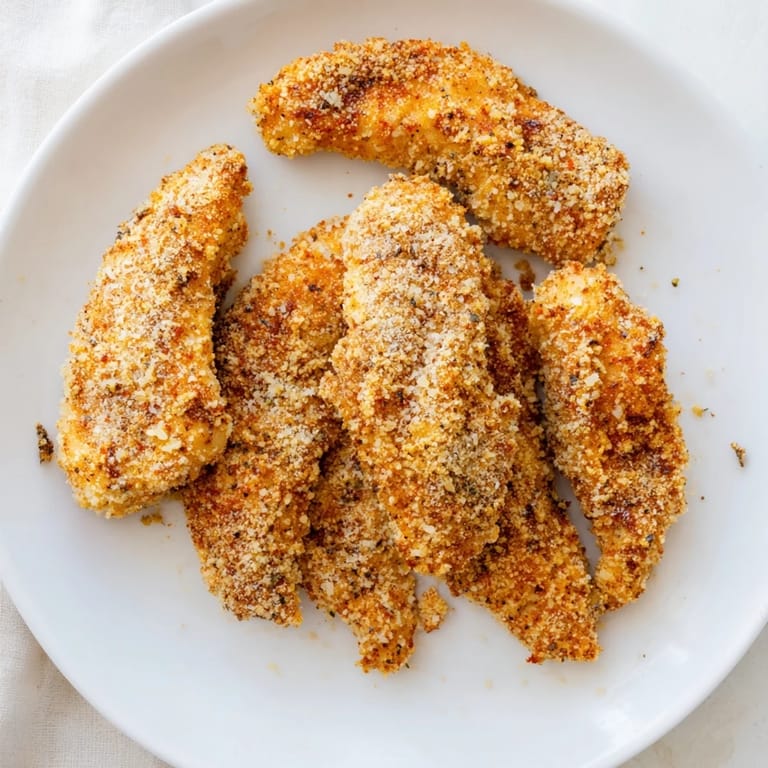
Save There's something about the sound of chicken hitting hot air that makes me pause whatever I'm doing. Years ago, I watched my neighbor pull golden, impossibly crispy chicken tenders from her new air fryer, and I was convinced she'd discovered something close to magic. The outside crackled when she bit into one, but the inside stayed tender and juicy—no grease, no guilt. I had to learn her secret, and now these are the tenders my family actually requests instead of the frozen kind.
I made these for my daughter's study group last semester, and one of her friends came back to the kitchen asking if I'd bought them from somewhere fancy. When I explained they came from the air fryer, she looked genuinely surprised—that's the moment I knew the recipe was a keeper. Simple ingredients, big results, and enough charm to make people wonder if you're hiding a restaurant-quality secret.
Ingredients
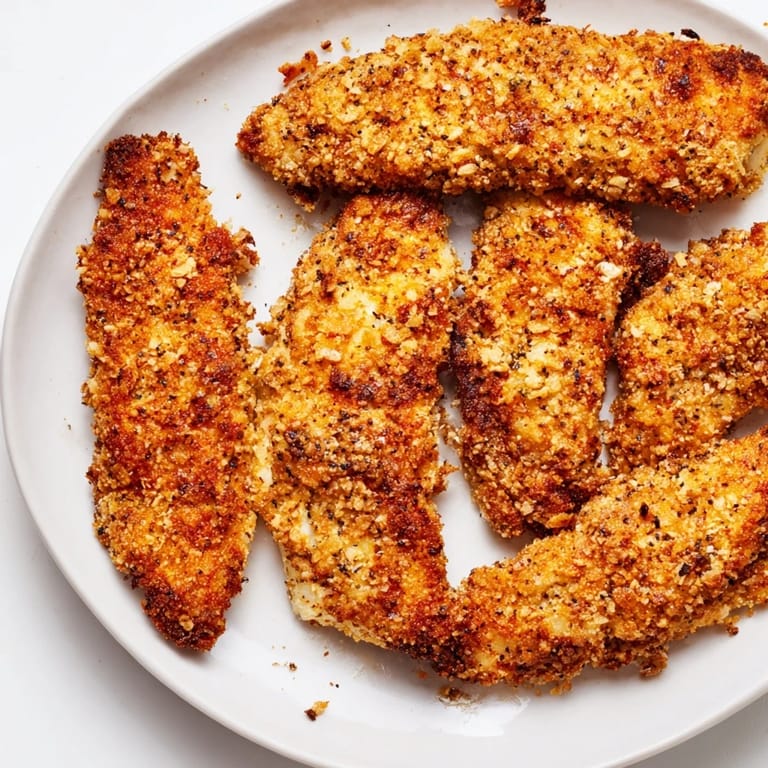
- Chicken tenders or breasts: The thinner, more uniform pieces cook faster and more evenly; slicing breasts yourself ensures consistent size and tenderness.
- Whole-wheat breadcrumbs: They hold their crunch better than panko in humid kitchens and add a subtle nuttiness.
- Parmesan cheese: Grated fresh is crucial—the pre-shredded stuff contains anti-caking agents that soften the crust.
- Smoked paprika: The smoke adds warmth without heat; regular paprika works but tastes flatter.
- Garlic and onion powder: Small amounts pack flavor and keep the coating from tasting one-dimensional.
- Eggs and milk: The mixture acts as glue; the milk thins it slightly so the coating isn't too thick.
- Olive oil spray: Just enough to crisp the outside; more spray means heavier results.
Tired of Takeout? 🥡
Get 10 meals you can make faster than delivery arrives. Seriously.
One email. No spam. Unsubscribe anytime.
Instructions
- Get your air fryer ready:
- Preheat to 200°C (400°F) for 5 minutes so the chicken hits heat immediately and develops that golden crust quickly.
- Dry your chicken thoroughly:
- Pat each piece with paper towels—any moisture keeps the breading from sticking and crisping properly.
- Mix your wet base:
- Whisk eggs and milk in a shallow bowl until smooth and slightly frothy; this helps the coating adhere evenly.
- Combine your seasoning blend:
- Mix breadcrumbs, Parmesan, and all spices in a second bowl; this step distributes the flavors so each tender gets the full seasoning profile.
- Coat each piece:
- Dip into egg mixture, let excess drip off, then press gently into breadcrumbs—don't overcoat, or you'll end up with thick, dense crusts instead of crispy ones.
- Arrange and spray:
- Lay chicken in a single layer with space between pieces, then spray both sides lightly with olive oil; the air circulation and light oil create that restaurant-quality crunch.
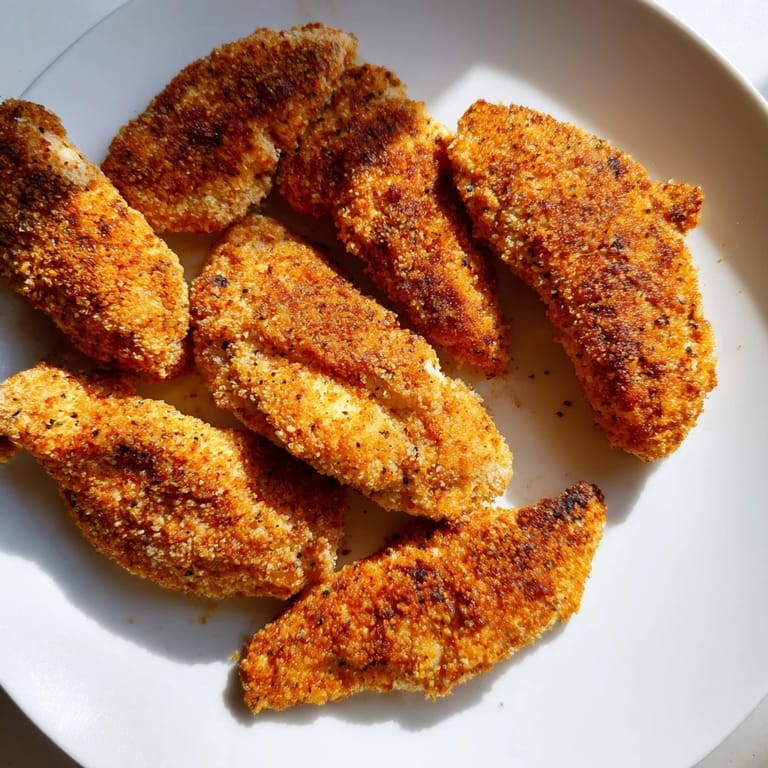
- Air fry until golden:
- Cook for 10–12 minutes, turning halfway through, until the outside is golden brown and the internal temperature reaches 75°C (165°F)—a meat thermometer takes the guesswork out.
- Rest and serve:
- Let them cool for just a minute so the crust sets properly, then serve hot with your favorite sauce.
 Pin it
 One Sunday I made these for a casual family lunch, and my usually quiet father asked for the recipe to share with his coworkers. That's when I realized these tenders had crossed from 'weeknight dinner' into something people actually wanted to recreate, which says more than any compliment ever could.
The Secret to Restaurant-Quality Crunch
The difference between good and great air-fried chicken comes down to three small moves: patting the chicken completely dry, not skipping the Parmesan in the breading, and using just enough oil spray to encourage crisping without creating grease. I learned this through trial, mostly by overshooting the oil and ending up with soggy results. Now I treat the oil spray like seasoning—less is almost always better. The air fryer does the heavy lifting; you just have to get out of its way and let the circulating heat do what it does best.
Beyond Plain Dipping Sauces
These tenders shine on their own, but they're also a blank canvas for whatever you're craving. A squeeze of fresh lemon and some flaky sea salt transforms them into something almost elegant. Greek yogurt mixed with a little hot sauce, honey, and garlic powder becomes a dip that tastes homemade and feels lighter than traditional ranch. My current obsession is a simple mix of Dijon mustard, maple syrup, and a pinch of Sriracha—it brings out the smoked paprika in the crust and feels like something between sweet and savory that shouldn't work but absolutely does.
Making Them Your Own
The beauty of this recipe is how forgiving it is to small changes. Swap in panko for extra crunch, use nutritional yeast instead of Parmesan if you're avoiding dairy, or add a pinch of cayenne for heat. I once added everything bagel seasoning instead of the individual spices, and it worked surprisingly well. The structure stays the same—wet coating, breadcrumb mix, light oil spray, air fryer heat—so the fundamentals work no matter what flavor direction you choose.
- For gluten-free versions, certified gluten-free breadcrumbs work just as well as regular ones.
- These freeze beautifully raw and breaded, so you can make a double batch on Sunday and cook from frozen on a busy Wednesday night.
- Leftovers stay crispy in an airtight container for two days, though they're rarely around that long.
 Pin it
 These tenders have become my quiet shortcut to making people feel cared for—something that tastes indulgent but doesn't require much skill or time. That's the kind of recipe worth keeping close.
Frequently Asked Questions
- → How do I ensure the chicken stays juicy inside?
Patting the chicken dry before coating and air frying at the right temperature helps lock in moisture, resulting in juicy tenders.
- → Can I substitute Parmesan cheese for a dairy-free option?
Yes, nutritional yeast works well as a dairy-free alternative, maintaining a savory flavor in the coating.
- → What type of breadcrumbs work best for extra crunch?
Panko breadcrumbs provide a lighter, crunchier texture compared to regular whole-wheat breadcrumbs.
- → Is it possible to bake these tenders instead of air frying?
Absolutely. Bake in a convection oven at 220°C (425°F) for 15–18 minutes, flipping halfway for even crispness.
- → How can I make this suitable for gluten-free diets?
Use certified gluten-free breadcrumbs to maintain the crispy coating without gluten.