 Save
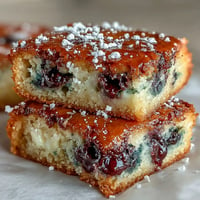
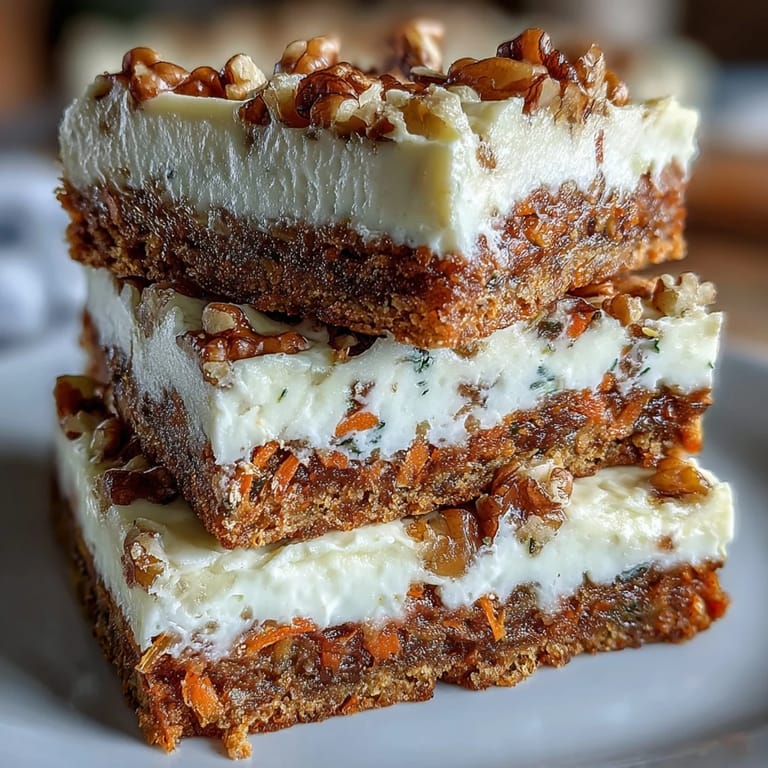
Save You know when you’re chasing something sweet but also want a little excitement? The first time I made these Carrot Cake Cheesecake Bars, the kitchen filled with a warm spiced scent that made me pause mid-whisk just to inhale it. My curiosity got the best of me after seeing both carrot cake and cheesecake on the same page of a brunch magazine. The fusion sounded like spring, but the colors made me think of autumn too, and suddenly the idea to swirl them together felt irresistible. These bars quickly became a small celebration in their own right, with their creamy swirl and carrot cake crumb.
One rainy afternoon, I decided to make a batch for my neighbor’s spring garden party. We ended up cutting them into tiny squares for easier sharing, and it sparked a spirited debate about whether to call them breakfast or dessert. Several guests asked for the recipe right before the platters ran out, and I remember realizing I’d found a new crowd-pleaser.
Ingredients
- All-purpose flour: Ensures a light but sturdy cake layer; measuring carefully prevents a dry bite.
- Baking powder & baking soda: The combination lends just a gentle lift without being too fluffy, so bars stay sliceable.
- Salt: A pinch balances the sweetness and deepens flavor; I always sprinkle it with a sense of purpose.
- Ground cinnamon & nutmeg: These spices wrap the batter in that classic carrot cake aroma; fresh spices do matter.
- Vegetable oil: Keeps the cake tender—don’t substitute butter unless you like a heavier crumb.
- Granulated & brown sugar: The blend brings complexity; brown sugar’s molasses tone pairs perfectly with carrots.
- Eggs: Bind both layers and enrich flavor; room-temperature eggs make mixing smoother.
- Vanilla extract: Infuses warmth; I love using pure extract for the best aroma.
- Finely grated carrots: The centerpiece; grate them finely for even baking and no crunchy surprise bites.
- Chopped walnuts or pecans (optional): They add a lovely crunch and nutty undertone; toast them if you want extra richness.
- Cream cheese: Softened is key; cold cream cheese will fight you and leave lumps.
- Optional toppings - chopped nuts & cinnamon: Finish the bars with texture and a subtle spiced sparkle; don’t skip if you love visual appeal.
Tired of Takeout? 🥡
Get 10 meals you can make faster than delivery arrives. Seriously.
One email. No spam. Unsubscribe anytime.
Instructions
- Set the Stage:
- Preheat your oven to 350°F (175°C) and line the baking pan with parchment, letting plenty hang off the sides—you’ll thank yourself later for easy lifting.
- Mix the Carrot Cake Batter:
- Combine the dry ingredients in one bowl, then whisk the oil, sugars, eggs, and vanilla in another; when carrot shreds hit the bowl, the color pops, and folding in nuts feels satisfyingly rustic.
- Blend the Cheesecake Layer:
- Beat softened cream cheese and sugar until light—don’t rush this, as it transforms from grainy to glossy, then mix in eggs, vanilla, and flour for creamy texture.
- Layer and Swirl:
- Spread half the carrot cake batter in the pan, pour the cheesecake mixture on top, then drop the rest of the carrot cake batter around and swirl gently with a knife—aim for ribbons, not over-mixing.
- Add Toppings:
- Sprinkle nuts and cinnamon over the surface if you fancy; their aroma intensifies during baking.
- Bake and Chill:
- Bake until edges are golden and the center jiggles just a little; let cool, then refrigerate a few hours for perfect slicing (resist the urge to shortcut—patience truly pays off).
 Pin it
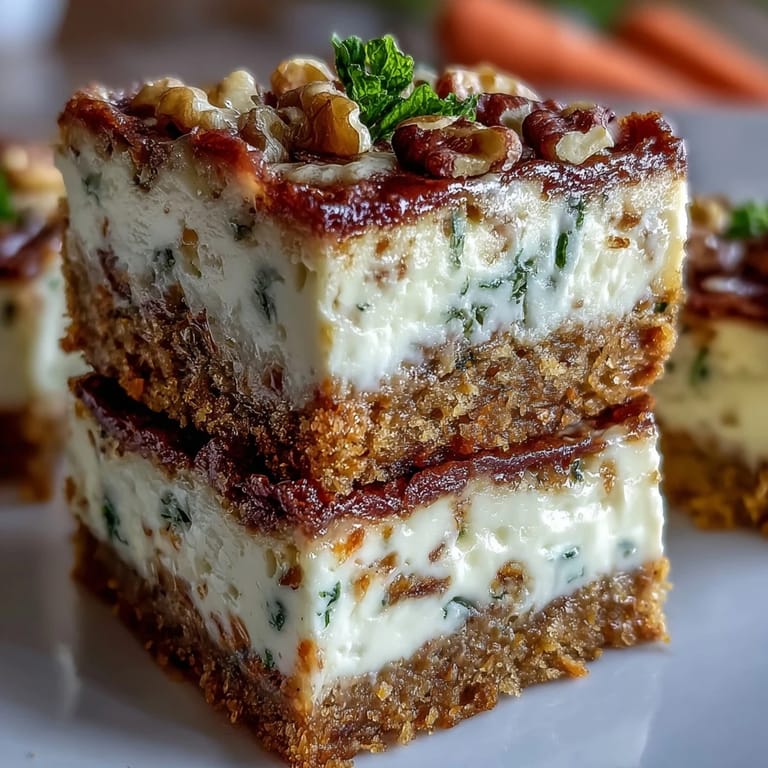
 Serving these bars at a family brunch, I was delighted watching people take a moment to admire the swirls and share little sighs after their first bite. Somehow, the layers encouraged conversation, and the bars became a centerpiece rather than just another dessert.
Swirl Success: Keeping Your Layers Gorgeous
The secret to keeping the marbled effect sharp is letting the cheesecake layer stay thicker than the carrot cake on top—too much batter, and you’ll drown the swirl. I always use a thin-bladed knife and work slowly so the colors stay distinct without mixing into a muddy shade.
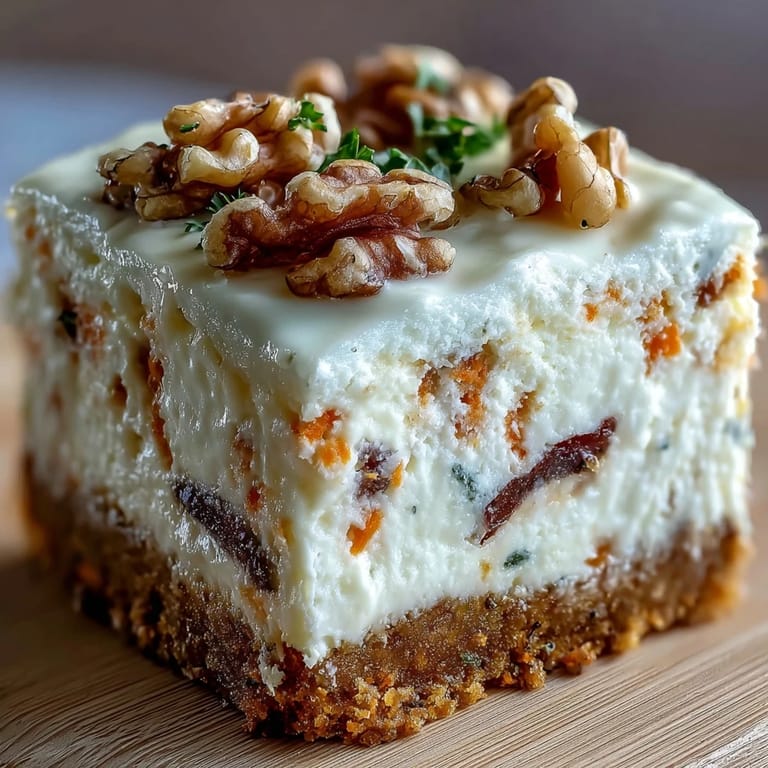
Perfect Chilling Makes Slicing Easy
Chilling overnight is best, but even three hours delivers a clean cut and luscious texture. I learned the hard way that impatience turns beautiful bars into a crumbly mess; now, I prep ahead if I want neat squares for sharing.
Creative Customizations That Work
Sometimes I toss in golden raisins or shredded coconut for extra sweetness and chew. Swapping in gluten-free flour makes these bars a hit for more friends, and spiced tea alongside creates a cozy atmosphere.
- If using nuts, toast them gently for maximum flavor.
- Parchment’s overhang saves the day when lifting bars—never skip it.
- Add a touch of ginger for a light kick if you’re feeling adventurous.
 Pin it
 Hope these bars bring you as much joy to make (and eat) as they have for me. Share them generously—they’re most memorable when enjoyed together.
Frequently Asked Questions
- → What makes these bars special?
They combine moist carrot cake and creamy cheesecake, creating a unique layered dessert with delightful textures and flavor complexity.
- → Can I add other ingredients to the cake batter?
Yes, raisins or shredded coconut can be folded into the carrot cake layer for extra flavor and texture.
- → How should the bars be stored?
Refrigerate the bars for up to five days in an airtight container to maintain freshness and texture.
- → Is there a gluten-free option?
Substitute a 1:1 gluten-free flour blend in the carrot cake layer to accommodate gluten sensitivities.
- → What tools are needed?
A baking pan, mixing bowls, mixer, whisk, spatula, parchment paper, and knife will cover the essentials for preparation.
- → What allergens are present?
Eggs, dairy, wheat, and tree nuts may be included, so check ingredient labels for cross-contamination if allergies are a concern.