Save
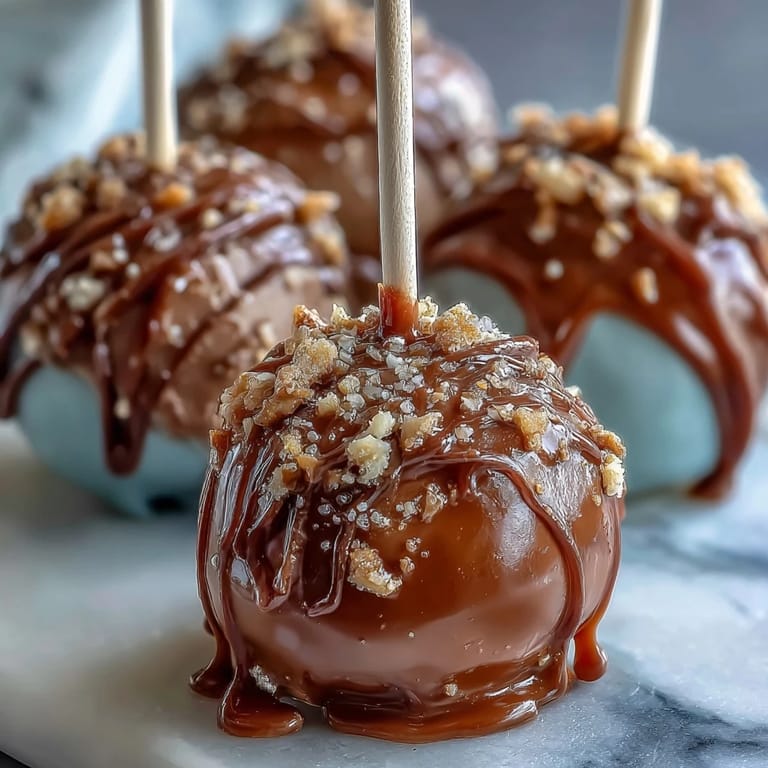
Save My cousin texted me three weeks before graduation asking if I could make something special for her open house—nothing fancy, just a way to make her guests smile. I found myself standing in the kitchen on a Tuesday evening, surrounded by school color samples she'd sent, thinking about how cake pops had become this delightful intersection of homemade charm and celebration-ready polish. There's something magical about turning a simple box cake into something that feels personalized and memorable, especially when gold catches the light just right.
I'll never forget standing at the kitchen counter at 11 PM the night before her party, watching my hands work on autopilot—crumble, mix, roll, chill—while my cousin sat on the stool beside me telling stories about her classmates. By the time I was dipping the final batch into the school's signature blue candy melts, we were laughing so hard I nearly dropped the whole thing into the Styrofoam block. The next day, watching people pick them up by the stick and actually linger over them, comparing the colors and making jokes about which teacher should get which one, I realized I'd made something that mattered beyond just dessert.
Ingredients
- 1 box vanilla or chocolate cake mix: Box mixes are your secret weapon here—they're reliable and honest, and nobody needs you to spend three hours making cake from scratch when the celebration is about the pops themselves.
- 1/2 cup unsalted butter, softened: Softening it ahead of time means your frosting will whip up light and fluffy instead of becoming a dense paste.
- 1 1/2 cups powdered sugar: This is what gives the frosting enough body to bind everything together without making the balls too wet to hold their shape.
- 1 tablespoon milk and 1 teaspoon vanilla extract: Milk thinns the frosting just enough to coat the crumbs evenly, while vanilla reminds everyone this is actually baked cake, not just a candy shell.
- Pinch of salt: Salt balances the sweetness and makes the vanilla flavor pop forward—don't skip it even though it seems small.
- 450 g candy melts in two school colors: Candy melts are forgiving and melt smoothly, which is why they're better than chocolate for this project (regular chocolate can be temperamental and grainy).
- 2 tablespoons vegetable shortening or coconut oil: This optional addition is honestly essential if you want a thin, elegant coating instead of a thick shell that makes the pops feel heavy.
- Gold sprinkles or edible gold glitter: This is where the celebration happens—apply it while the coating is still wet so it sticks and catches light when someone holds it up.
- 24 lollipop sticks and Styrofoam block: The sticks make them easy to eat and gift-worthy, and the Styrofoam block becomes your drying station (and honestly, part of the fun).
Tired of Takeout? 🥡
Get 10 meals you can make faster than delivery arrives. Seriously.
One email. No spam. Unsubscribe anytime.
Instructions
- Bake the cake, then let it breathe:
- Follow the box instructions exactly—no shortcuts, no substitutions—and then give that cake real cooling time, ideally overnight if you have it. A warm cake releases moisture that will throw off your frosting ratios later.
- Whip the frosting until it's genuinely fluffy:
- Beat the softened butter first until it's pale and light, then gradually add the powdered sugar while the mixer is running so you avoid a cloud of white powder coating your kitchen. Once it looks like actual frosting—smooth and slightly airy—add your milk, vanilla, and salt.
- Crumble and combine with intention:
- Break the cake into fine crumbs (some people use a food processor, but I like doing it by hand because you can feel when it's the right texture). Mix in frosting a little at a time, tasting as you go—you want something that holds together when you squeeze it but doesn't feel like frosting paste.
- Roll perfectly sized balls:
- Use about a tablespoon of mixture for each one, rolling between your palms until they're smooth and uniform. Uniform size matters because it ensures even cooking and a professional appearance when they're all lined up together.
- Chill until they're actually firm:
- At least an hour in the refrigerator or 30 minutes in the freezer—this is non-negotiable if you don't want your pops falling off the sticks mid-dip. I set a phone alarm so I don't forget they're in there.
- Secure those sticks with intention:
- Melt just enough candy melts to dip the stick tips, then insert them about halfway into each ball—this anchors them so they stay put when you dip the whole thing in the coating later.
- Dip with confidence, one color at a time:
- Melt your school colors in separate bowls, stirring in shortening if you want that silky finish. Dip each pop, gently tap off the excess (here's the trick: tap against the side of the bowl, not over it, so you don't splash), and immediately place it in the Styrofoam.
- Decorate while everything's still wet:
- The gold sprinkles need a sticky surface to cling to, so work quickly once you've dipped—a light shake of gold right away, and you've got something that genuinely sparkles.
- Let them set completely before moving them:
- This takes longer than you think, usually 30 minutes to an hour depending on your kitchen temperature. Patience here means pops that stay on their sticks instead of sliding off mid-bite.
 Pin it
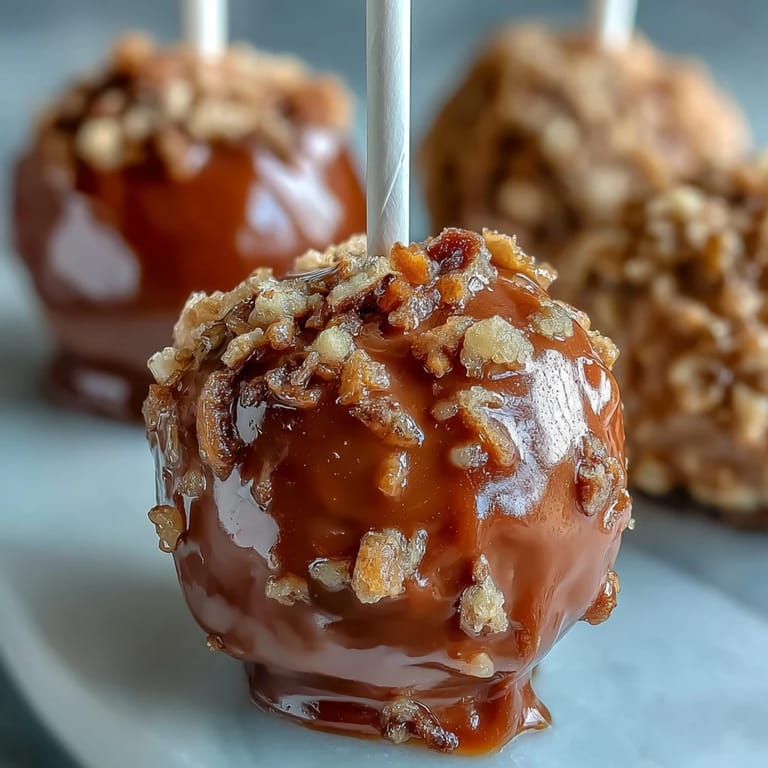
 There's a specific moment when you pull the Styrofoam block out and see all 24 pops standing at attention, gleaming with gold, that you realize you've made something worth the effort. My cousin's friends were taking photos of them before eating them, which felt like the highest compliment a homemade dessert could receive.
Making Them Ahead (Your Secret Weapon)
Here's what I wish someone had told me earlier: you can make these days in advance and actually enjoy your celebration. Bake and cool the cake one day, make the frosting and balls the next, then dip and decorate the morning of your event. Store the finished pops in an airtight container at room temperature, and they stay fresh and the coating stays snappy for up to three days. This approach takes the stress completely out of the equation.
Customizing for Your School
The beauty of this recipe is that it's a template waiting for your personality. If your school colors are navy and gold, you could do navy dips with extra gold glitter, or alternate them by color. If you're working with something like maroon and white, you could even do a two-tone dip by quickly swirling one color into the other before it sets. Some people tie tiny ribbons around the sticks in school colors, others add a little school logo printed on a toothpick if they're feeling ambitious.
Flavor Adventures Beyond Vanilla
While vanilla cake is reliable and classic, don't feel locked into it. Chocolate cake pops dipped in your school colors create a different kind of drama, especially under gold glitter. Lemon or strawberry cake mixes give you a lighter, brighter vibe if you're celebrating during warmer months. The frosting stays the same, so you're just changing one variable—which means you can experiment without complexity.
- If you go with chocolate cake, consider using a lighter-colored candy melt (white or pale pink) to make the contrast pop.
- Flavored extracts in the frosting (almond, lemon, or even a touch of coffee) can echo and enhance your cake choice without overwhelming the whole thing.
- The gold sprinkles work with any flavor combination, so feel free to think of them as your constant while everything else shifts.
 Pin it
 Making these cake pops is less about precision and more about showing up with something that tastes good and looks like you actually celebrated someone. That's what matters.
Frequently Asked Questions
- → How do I ensure the cake balls hold their shape?
Mix the crumbled cake with enough frosting to create a moist but firm mixture. Chill well before shaping and dipping to prevent falling apart.
- → Can I use different cake flavors for these pops?
Yes, vanilla or chocolate cake mixes work well, and you can experiment with other flavors to complement your theme.
- → What helps achieve a smooth coating when dipping?
Adding vegetable shortening or coconut oil to melted candy melts thins them slightly, allowing an even coating and smoother finish.
- → How should I store these treats after preparation?
Store at room temperature in an airtight container for up to 3 days, or refrigerate for up to a week to maintain freshness.
- → Are there any allergen considerations to keep in mind?
These pops contain wheat, eggs, milk, and possibly soy from candy melts. Check ingredients if serving to those with allergies.