 Save
Save A friend handed me a shot glass filled with tiramisu at a dinner party, and I was completely thrown off. I expected the usual spoon-and-plate situation, but instead I got this elegant little glass with layers I could actually see through the sides. The espresso hit first, then that cloud of mascarpone, and I realized someone had solved a problem I didn't know existed—how to eat tiramisu without the mess. I've been making these ever since, mostly because they disappear faster than anything else I bring to a gathering.
I made these for my sister's book club last winter, and watched people who swore they didn't like tiramisu ask for the recipe. One person mentioned she'd never had espresso hit her palate that directly, and suddenly everyone was talking about coffee like they'd never really tasted it before. That's when I understood these shots do something different—they slow you down, make you notice each layer, each flavor.
Ingredients
- Ladyfinger biscuits (savoiardi), 8 broken into bite-sized pieces: These are the backbone of any tiramisu, and they matter more than you'd think because they're sturdy enough to soak without dissolving into mush. I learned to break them into smaller pieces than I initially thought because they swell as they absorb the espresso.
- Freshly brewed espresso, 1/2 cup cooled: Brewing it fresh and letting it cool completely prevents the mascarpone from getting warm and breaking, which I discovered the hard way one afternoon.
- Coffee liqueur (Kahlúa or Tia Maria), 2 tbsp: This adds a subtle sweetness and depth that makes people pause and wonder what that extra note is. You can absolutely skip it if you want—the espresso alone is plenty bold.
- Mascarpone cheese, 1 cup at room temperature: Cold mascarpone seizes up and turns grainy when you try to whisk it, so I learned to leave it out for twenty minutes. This one tip changed everything for me.
- Heavy cream, 1/2 cup cold: The contrast between cold cream and room-temperature mascarpone creates that perfect texture, almost cloud-like.
- Powdered sugar, 1/4 cup: A quarter cup is enough to sweeten without making these cloying, which is crucial since espresso can handle restraint.
- Pure vanilla extract, 1 tsp: Just enough to round out the edges without making anyone say,
why does this taste like vanilla?
- Unsweetened cocoa powder, 2 tbsp for dusting: The unsweetened kind is essential because you're not adding extra sweetness here—you want that cocoa bite.
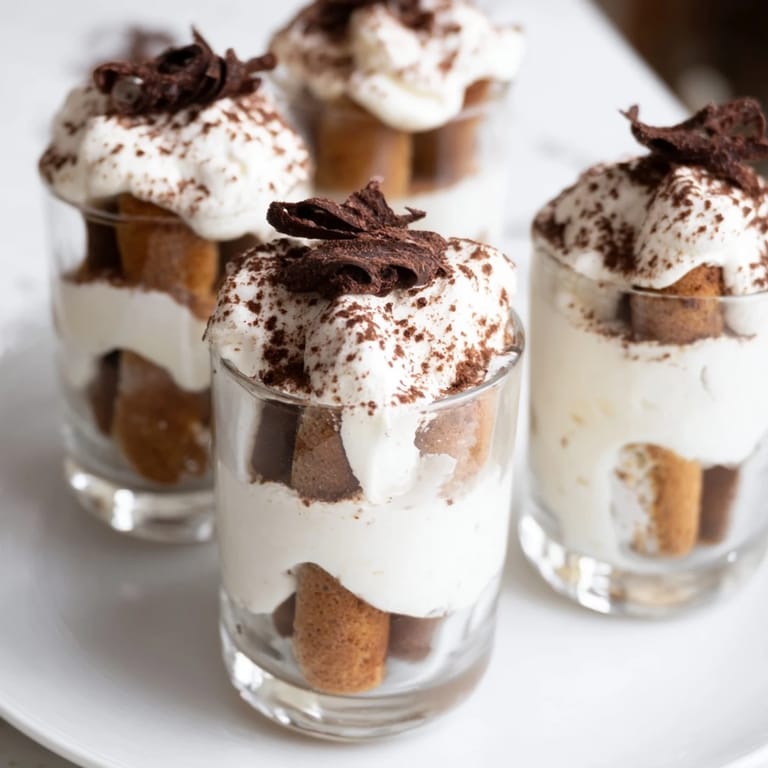
- Dark chocolate shavings optional for garnish: These catch the light beautifully and add a textural surprise, though they're purely decorative.
Tired of Takeout? 🥡
Get 10 meals you can make faster than delivery arrives. Seriously.
One email. No spam. Unsubscribe anytime.
Instructions
- Make the coffee dip:
- Pour your cooled espresso and liqueur into a shallow bowl and give it a quick stir. This is where I learned the word
briefly
means something—you want the biscuits kissed by the liquid, not baptized in it, or they'll turn to soup. - Dip and set the biscuits:
- Hold each piece just long enough for it to absorb a little moisture, then lay them on a plate. You're looking for them to still have structure but taste like coffee, which usually takes about two seconds per piece.
- Whisk the mascarpone base:
- In a medium bowl, combine your room-temperature mascarpone, powdered sugar, and vanilla, whisking until it's completely smooth and there are no lumps hiding anywhere. This should take a minute or two, and you'll feel when it suddenly becomes silky.
- Whip the cream to soft peaks:
- In a separate bowl, whip your cold heavy cream until it holds gentle peaks when you lift the whisk—not stiff, just pillowy. This takes about three or four minutes depending on how cold everything is.
- Fold the cream into the mascarpone:
- This is the moment everything changes texture. Gently fold the whipped cream into the mascarpone in two additions, being careful not to deflate all that air you just created. You're folding, not stirring, which makes all the difference.
- Layer the first biscuit base:
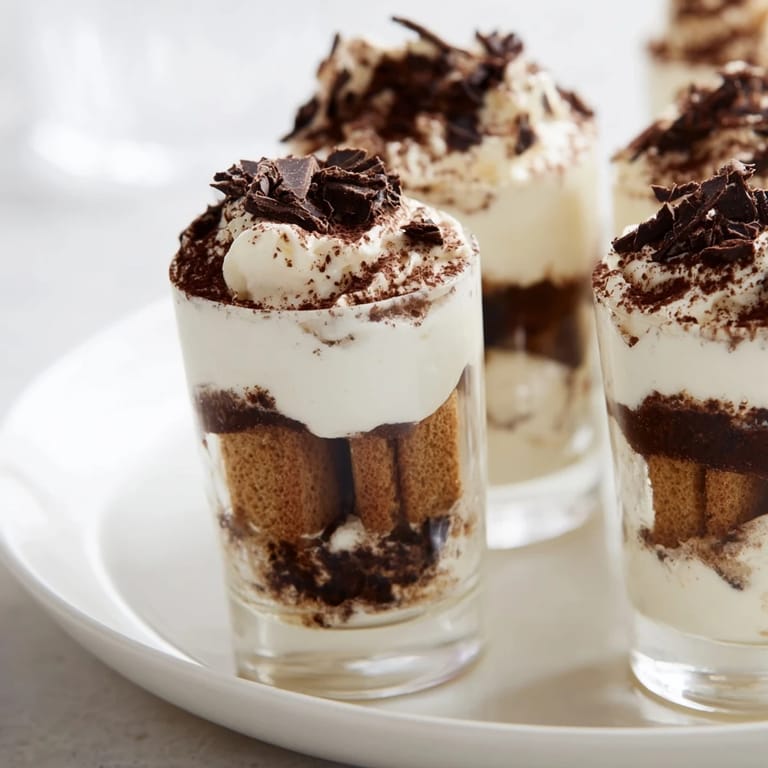
- Place a few pieces of espresso-soaked ladyfinger at the bottom of each shot glass. You want them distributed so you can see them through the glass, creating that beautiful layered look.
- Add the first mascarpone layer:
- Spoon or pipe the mascarpone cream over the biscuits, filling the glass about halfway. If you're piping, it looks more intentional, but honestly, spooning works perfectly fine if that's your style.
- Build the second layer:
- Repeat with another layer of soaked biscuits, then top with the remaining mascarpone cream. You're creating a pattern here that's as much about presentation as it is about flavor.
- Dust and finish:
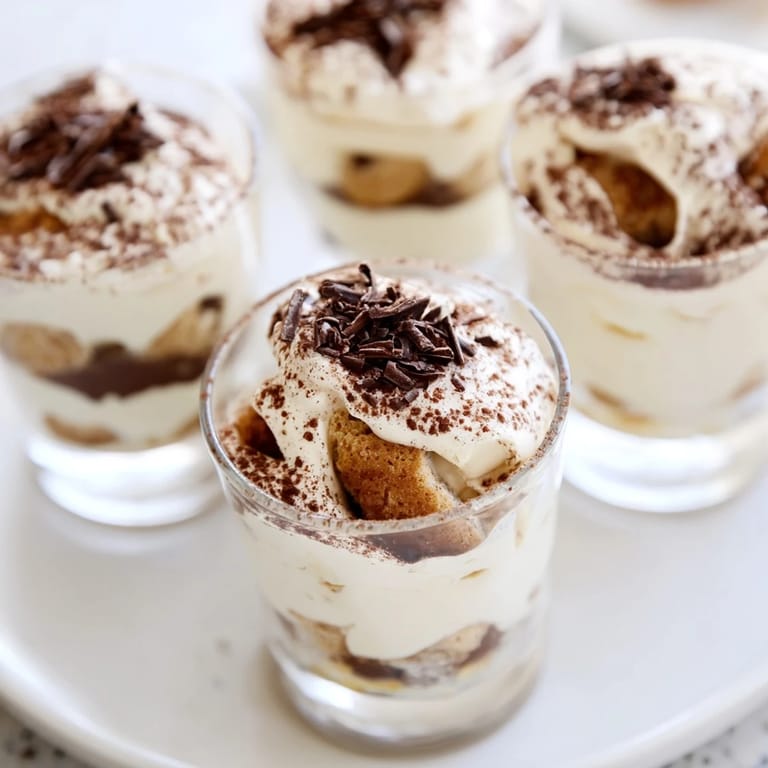
- Just before serving, sift cocoa powder over the tops—the sifter makes it even and beautiful, though a fine mesh strainer works too. Add chocolate shavings if you're feeling fancy, then refrigerate for at least an hour so everything sets and the flavors marry.
 Pin it
 The first time someone asked me to make these for their wedding shower, I almost said no because they seemed too casual for such an elegant event. But watching eighty-year-old relatives in their finest dresses ask for thirds, and seeing people who'd never met before bond over these tiny glasses of espresso and cream, I understood that sometimes the most sophisticated thing is knowing when to break the rules. Tiramisu belongs in shot glasses, and now I can't imagine it any other way.
Why the Presentation Matters
There's something about seeing each layer through the glass that changes how you experience dessert. Your eye gets involved before your mouth does, and you start anticipating the different textures and flavors coming together. The shot glass itself signals permission to eat with your hands, to be playful, to treat this moment as something a little less formal than a plated dessert. I've noticed people linger over these longer than they do over bigger portions, taking time to taste each component instead of rushing through.
Making Them Ahead
The best part about tiramisu shots is that they actually improve after a few hours in the refrigerator. The flavors deepen, the layers knit together slightly, and the texture becomes almost custard-like. I usually make them four to six hours before serving, which means I can focus on other things or just relax before guests arrive. You can even make them the night before—just wait until an hour before serving to dust the cocoa powder so it doesn't get damp.
Custom Touches and Variations
Once you understand the basic structure, you can play with it. I've made these with a splash of rum instead of coffee liqueur for a different vibe, and once I pressed crushed amaretti biscuits into the bottom of each glass for texture. Some people layer in a tiny bit of chocolate mousse between the mascarpone and the second set of biscuits, which feels almost sinful. The espresso-to-cream ratio can shift depending on how bold you like your coffee—I've made batches with more espresso for serious coffee lovers and toned it down slightly for people who found the original too intense.
- Try substituting the ladyfingers with panettone for a holiday version, or sponge cake if you need gluten-free.
- A tiny splash of brandy or Marsala wine works beautifully if you want to lean into the Italian tradition without the coffee liqueur.
- For a non-alcoholic version, just skip the liqueur entirely and use slightly more espresso—the flavor doesn't suffer at all.
 Pin it
 These shots remind me that dessert doesn't have to be complicated to feel celebratory. They're proof that the smallest moments—sharing something delicious with people you like—are where the real joy lives.
Frequently Asked Questions
- → Can I make these shots non-alcoholic?
Yes, simply omit the coffee liqueur and use extra espresso to maintain the rich coffee flavor without adding alcohol.
- → What can I substitute for ladyfinger biscuits?
Sponge cake pieces or gluten-free biscuits can be used as alternatives, adapting to dietary needs without compromising texture.
- → How long should these tiramisu shots be chilled?
Chilling for at least one hour allows the flavors to meld and the cream to set properly for the best taste and texture.
- → Can I prepare this dessert in advance?
Yes, assembling the shots ahead of time and storing them refrigerated helps deepen the flavor and simplifies serving at events.
- → What’s the best way to garnish the tiramisu shots?
Dusting with unsweetened cocoa powder is classic, and adding dark chocolate shavings provides an elegant finishing touch.